DIYs
Ten minute no-sew draft excluder January 6, 2017 23:00 1 Comment
It is so cold. Our house feels like a drafty sieve. The back door in particular has huge gaps round it letting the frosty air in. I needed an immediate solution today, so I reactivated this super quick, no-sew tutorial for a draft excluding door sausage made from an old pair of jeans. I'm particularly pleased because I've both saved the jeans from landfill and I haven't added to the number of things we own as it's totally upcycled from stuff in the house.
You will need
- A pair of trousers
- Good scissors
- Something to stuff the door sausage with. I used the wool wadding that I kept from Hello Fresh boxes but I could have used lone socks, or a scratty pillow or anything soft that can be chopped up easily.
 Take one pair of trousers and cut off both the legs. You can cut up the top of the trousers to make wadding, or just use as cut-offs if you can remember what it's like to be warm.

Set one leg aside, and cut the other lengthwise so it's a long, wide strip of fabric.
Make a little snip in the denim of one leg with your scissors about 2cm from the edge of the fabric

Grab the fabric each side of the snip - and rip! The fabric will tear along the grain in a nice straight line and you'll end up with a 2cm wide strip of fabric. Repeat two more times so you end up with two more strips. These second two strips will have a nicely frayed, distressed edge, so there's no need to hem or finish them.
.

Take the remaining trouser leg and tie one end closed with a strip of denim
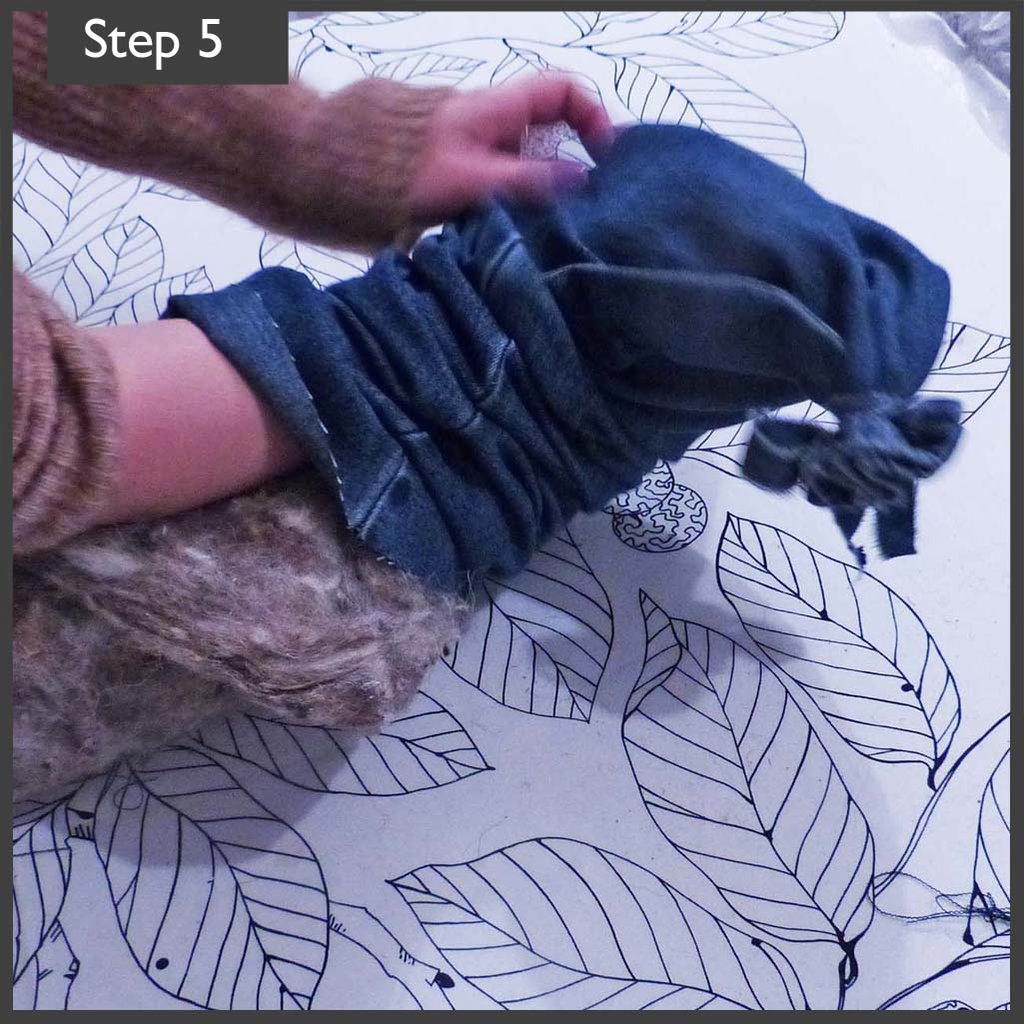
Stuff plenty of wadding into the trouser leg, until it's pretty firm, but not stiff or solid

Then use the other strip to tie up the open end and squish the sausage into shape.
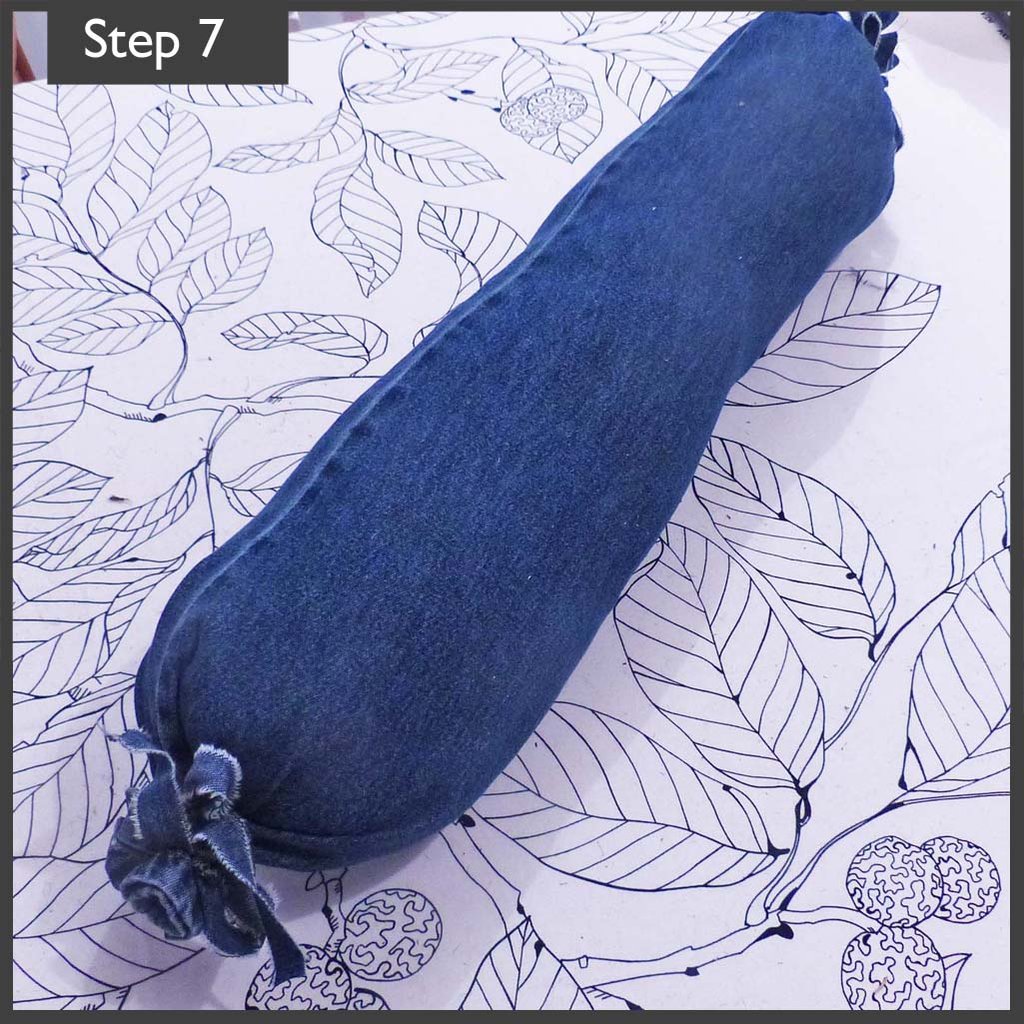
Done!
I love using up old jeans for things, denim is so nice to work with. Have you got any great jeans recycling ideas or projects to share? Let us know in the commments
Road testing decoupage map coasters January 4, 2017 20:02 1 Comment
I love holidays, but beach holidays bore the backside off me. I'm too fidgety, so I much prefer a city break holiday. My favourites have included Glasgow, Seville and most recently Berlin. We always pick up a touristy map and use it until it's ratty and falling apart, but as part of my decluttering drive I can't really justify keeping them any more. I decided to try out a Pinterest classic that will turn them into something functional for everyday. Yes, it's decoupage map coasters.

I chose the hard finish Mod Podge. It's waterproof, and has a lovely matte finish. Much as I adore Pinterest, you never know if the projects will actually work out in reality so this is a bit of a road test.

Cut out a bit of map that's a bit bigger than your coaster

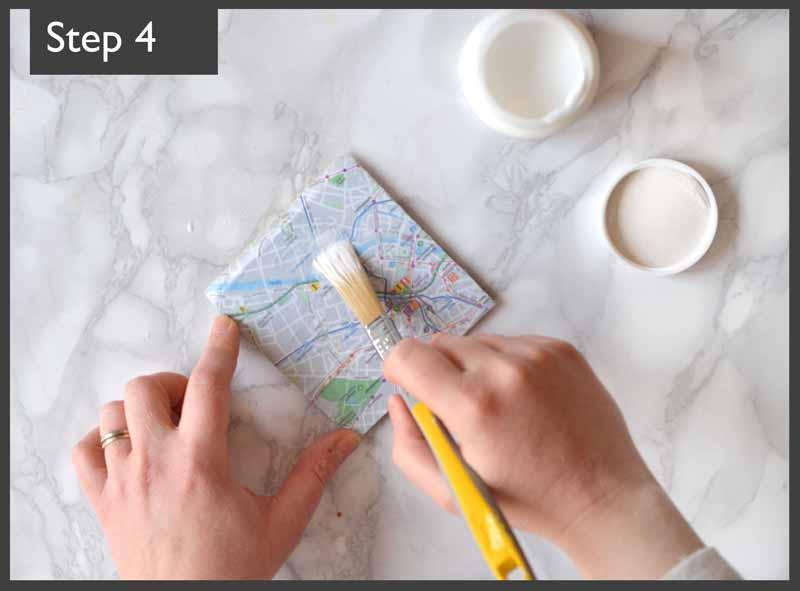
Paint a layer of modpodge on the back of your map. Use enough to wet the paper but not to soak it.

Rub the map onto the coaster. Use your fingers to rub out as many air bubbles as you can as quickly as you can, but don't rub so hard you damage the map. Rub from the middle outwards
Add another layer of Mod Podge - pay extra attention to the corners to stick them down. If it's too thick, use your fingers to smooth the excess Mod Podge away

Leave it to dry for half an hour. Don't worry if a few wrinkles have sneaked back in, the paper will stretch out a bit as it dries. I stood mine on a bowl but the lid of the Mod Podge will do fine if it's clean.

When it's touch dry, use your scissors to trim right to the edge of the coaster. It's easier to do if the back is facing you. Spend a bit of time getting this as neat as you can.

Build up two to three more layers of Mod Podge. Each time make sure the edges and the corners are really covered well. Use your fingers to smooth away any excess if needs be, and get a nice finish. When it's wet it looks very streaky, but as it dries and goes matte it smooths out a lot.
Mine is still curing (4 weeks it's say on the tub!!!) but I'll use it a couple of days and let you know how waterproof it really is, and how it handles hot tea cups! I'm really pleased with the end result though, it's a very neat finish. I just need to find a few more coasters to sacrifice.
Have you tried this before? Do you have any top tips for making it work better? And are there any other classic Pins you'd like us to road test? Let us know in the comments box. (If you can't see the comments, you need to click on the blog title and they should appear!)
Chalkboard Cushion DIY tutorial May 5, 2015 21:27 11 Comments
 |
Here's how to make the ultimate in personalised gifts - a cushion cover you can write messages on in chalk. A wipe with a damp cloth and you've got a plain black and white cushion again, ready for the next message. |
 |
You will need |
 |
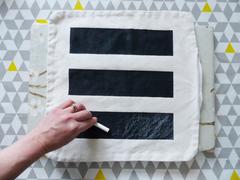
Draw a series of rectangles on the matt side of the freezer paper - whatever size fits nicely on the cushion. Cut out the squares - be very very careful to cut precisely into the corners, and no further |
 |
Lay the freezer paper with the shiny side on the fabric, and iron it. The freezer paper will stick to your fabric. ***TOP TIP*** Try to press down with the iron without rubbing back and forth, your freezer paper will go on without crinkles that way. |
 |
Use a brush to gently paint on the chalk board paint. Paint from the outside of the rectangle inwards, so you're less likely to get paint under the edges of the freezer paper. ***TOP TIP*** If your fabric is thinner, put a sheet of paper inside to stop paint soaking through from the front to the back. |
 |
While the paint is still wet, carefully peel off the freezer paper - it should come away easily |
 |
When the paint is dry, rub chalk all over it, and then rub it in with a dry cloth. This "grits" the paint and makes the chalk write on it better. (And if you put a sheet of paper inside earlier, now's the time to remove it) |
 |
Use chalk to write on your cushion - when you want a new message, just wipe with a damp cloth, and start again. |